

Stages Cycling
Stages Brake Shaft 000-3927 – SC2 & SC3 Resistance Adjustment Shaft
Stages Brake Shaft 000-3927 for SC2 & SC3 Indoor Cycles
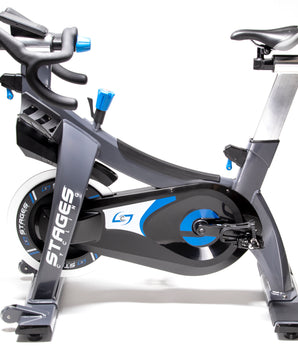
The Stages Brake Shaft (Part No. 000-3927) is an OEM replacement component used in the resistance adjustment system of Stages SC2 and SC3 indoor cycles. The shaft connects the Stages Resistance Knob to the Stages Push w/ Insert assembly, allowing riders to increase or decrease resistance during a workout.
As the rider turns the resistance knob, the Brake Shaft transfers that movement through the Push w/ Insert and into the resistance mechanism. Proper engagement between these components is essential for smooth and reliable resistance adjustment.
Important: Stages Brake Shaft 000-3927 is compatible with Stages SC2 and SC3 indoor cycles only. This part is not compatible with Stages SC1 indoor cycles, which utilize a different resistance adjustment shaft design.
Common Resistance Adjustment Failure
One of the most common resistance-related service issues on Stages SC2 and SC3 indoor cycles occurs when the rider turns the resistance knob, but the resistance does not increase or decrease.
In many cases, the cause is a worn or stripped brass insert inside the Stages Push w/ Insert assembly. Because the threaded end of the Brake Shaft screws directly into this brass insert, wear can develop over time from repeated resistance adjustments.
When the threads no longer properly engage, the Brake Shaft may simply spin within the Push w/ Insert rather than moving the resistance mechanism.
Common symptoms include:
- Resistance knob turns but resistance does not change
- Resistance adjustment becomes inconsistent
- Resistance knob feels disconnected from the bike
- Shaft spins without properly engaging the resistance assembly
- Unable to increase or decrease resistance during a ride
Indoor Cycle Pros Service Recommendation
When this condition occurs, Indoor Cycle Pros recommends replacing both the Brake Shaft (000-3927) and the Stages Push w/ Insert assembly at the same time.
In our experience servicing Stages indoor cycles, wear is often present on both mating components. Installing a new Brake Shaft into a worn brass insert may result in premature failure, while installing a new Push w/ Insert onto a worn shaft may not fully resolve the issue.
Replacing both components together helps restore proper thread engagement and provides the most reliable long-term repair.
Compatible Models
- Stages SC2 Indoor Cycle
- Stages SC3 Indoor Cycle
Not Compatible With
- Stages SC1 Indoor Cycle
Related Parts
- Stages Resistance Knob
- Stages Push w/ Insert
Need assistance diagnosing a resistance adjustment issue on your Stages indoor cycle? Contact Indoor Cycle Pros for expert troubleshooting support and genuine OEM Stages replacement parts.
FAQs
Indoor Cycle Pros is the official direct distributor of Stages Cycling commercial indoor bikes for U.S. studios. We specialize in helping boutique studios and gyms source, maintain, and service their bikes with expert support and prompt access to Stages parts.
Indoor Cycle Pros ships new Stages bikes nationwide across the United States, and delivers Stages parts and accessories to clients worldwide.
We exclusively carry Stages Cycling indoor bikes because Stages is the only fitness brand 100% focused on commercial indoor cycling. Unlike other manufacturers that produce treadmills, rowers, and ellipticals, Stages builds only indoor cycles—resulting in the most advanced and durable bikes on the market for studio use.
Absolutely not! Stages Cycling is thriving under the ownership of Giant Manufacturing Co., the world's largest bicycle manufacturer, established in 1972.
Yes, we provide ongoing support for Stages indoor bikes, including maintenance tips, troubleshooting help, and virtual or onsite service.
Yes, our finance team has supported studios and gyms since 2015 with the most competitive options for financing Stages bikes. To get started, fill out our Contact Form.
Both the Stages SC2 and Stages SC3 bikes share a commercial-grade frame but differ in rider features. SC2 is ideal for rhythm riders; SC3 for performance tracking and metrics.
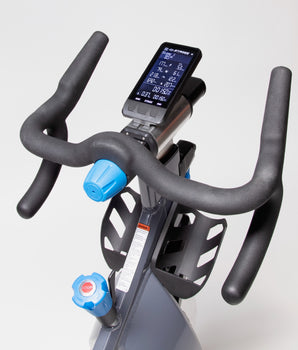
SC2 Highlight: Black pop-pin adjustment knobs, RhythmBar™ handlebars, no console.
SC3 Highlight: Blue FitLoc™ levers, RoadBar™ handlebars, EcoSCRN console, and built-in power meter.
Each Stages bike includes a dual function pedal that offers both SPD cleat compatibility on one side and a toe cage with an adjustable strap for standard athletic shoes.
No, the Stages Display Console is only compatible with the Stages SC3, which contains the required internal generator. The Stages SC2 does not support console connectivity.
Yes, you can upgrade your Stages FitLoc Lever to the Stages Pop-Pin with Knob! You will need a 2mm Allen, a 2.5mm Allen, and a 3mm ball-end Allen wrench.
How do I replace a Stages Power Meter?
To replace your Stages Power Meter Crank Arm (which includes the entire left crank arm with integrated power meter), follow the step-by-step instructions below using the proper tools and supplies.
🔧 Tools & Supplies Needed
- 8mm Allen wrench or 8mm Allen socket with ratchet drive (recommended)
- Park Tool HPG-1 High Performance Grease
- Park Tool PW-4 Professional Pedal Wrench (or equivalent)
- Loctite 243 (blue threadlocker)
- TitanFlex heavy-duty nitrile gloves (or equivalent)
🛠️ Step-by-Step Instructions
-
Wear Gloves
Put on nitrile gloves to keep grease and threadlocker off your skin. -
Remove the Pedal
Use a pedal wrench to remove the pedal from the existing crank arm.- Left pedal = reverse-threaded (turn clockwise to loosen)
-
Remove the Existing Crank Arm
Use an 8mm Allen wrench or socket with ratchet to turn the crank bolt counter-clockwise.- This is a self-extracting bolt — it will loosen and automatically remove the crank arm.
-
Clean the Spindle
Wipe the bottom bracket spindle's splines and internal threads clean using a dry cloth. -
Apply Grease and Threadlocker
Apply a thin coat of Park Tool HPG-1 grease to the spindle splines and a small drop of Loctite 243 to the internal threads of the spindle. -
Install the New Stages Power Meter Crank Arm
Slide the new crank arm onto the spindle so it is 180° opposite the right crank arm. -
Tighten the Crank Bolt
Thread the crank bolt in by hand, then firmly tighten with your 8mm wrench or ratchet. -
Reinstall the Pedal
Thread the pedal back into the new crank arm.- Left pedal = reverse-threaded (turn counter-clockwise to tighten)
-
Final Check
Ensure both crank arms are 180° apart, the crank spins smoothly, and all bolts are secure.
For the Stages bike frame, use a diluted solution of Simple Green at a ratio of 1:30 (1 part Simple Green to 30 parts water). Spray onto a microfiber cloth and wipe the entire frame including crank covers. Dry with a clean microfiber cloth.
Stages indoor bikes use only metric tools. Never use fractional tools. For a complete tool guide, email us at sales@indoorcyclepros.com and we’ll provide access to our Stages Bike Tool Kit.
Use a 13mm open end wrench or 13mm socket with ratchet to loosen each side of the saddle clamp, make your adjustment, then re-tighten evenly. Check out our Stages saddles collection.
Use a quality #0 Phillips screwdriver to remove the tiny screws on the battery cover of your Stages Power Meter. Replace the AA batteries, ensuring the correct +/− orientation. For a tighter fit, wrap a layer of electrical tape around each battery.
Find the 5-digit ANT ID on your Stages Power Meter. While pedaling, open the StagesPower app and check for a matching device. If no connection occurs, press the reset button for 3 seconds, try again, and replace AA batteries if needed.
Yes! Our design and buildout team can help bring your studio vision to life. Fill out our Contact Form and we’ll reach out to get started.
CAN'T FIND WHAT YOU NEED?
We love to help! Email us at sales@indoorcyclepros.com!


Latest Blogs
Explore detailed and useful content on indoorcyclepros.com. Read our insightful articles for valuable tips and information.

Stages SC2 vs. Schwinn Aetherion | Best Indoor Cycling Bike for Rhythm Studios
Stages SC2 vs Schwinn Aetherion: Which Indoor Cycling Bike Is Best for Rhythm Studios? Selecting the right indoor cycling bikes...
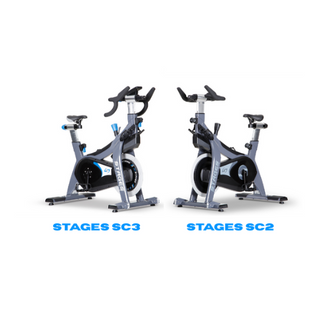
Stages SC2 vs SC3: The Definitive Studio Owner’s Guide (2025)
Since 2015, I’ve personally assembled and tuned thousands of Stages indoor bikes for boutique studios across the U.S. If you’re...
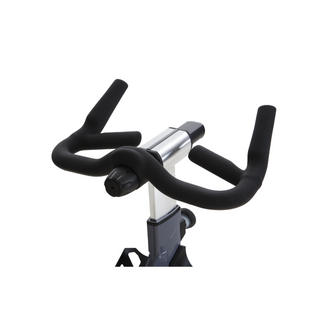
Stages SC2 RhythmBar™ Review: The Ultimate Bike for Rhythm Cycling Studios
Why the Stages SC2 with its RhythmBar™ is the Best Studio Bike for Rhythm Cycling When it comes to indoor...